Prep Work:
- Make sure that you have installed oracle 11g R2 database software.
- If you installed the sample database during the install you will make your life easier.
- Make sure that the PS_HOME and ORACLE_HOME is in your PATH file.
- Verify that PeopleSoft is installed on your computer. All the needed scripts to make the seed database are found in the PS_HOME directory.
PeopleSoft Seed Database Install:
- Log in to Oracle Linux as the "oracle" user
- We need to make a init*.ora file. Open a new terminal and follow the commands below:
- [oracle@localhost ~]# cd $ORACLE_HOME --Oracle_Home = /apps/oracle/product/11.2.0
- [oracle@localhost 11.2.0]# cd dbs
- [oracle@localhost dbs]# gedit initPS91DMO.ora --This will make a new file. This file will be used to create your database. It wall also be used to start your database later on.
- Now we are going to populate and save the initPS91DMO.ora file with following information:
- Currently the folders that will hold our "control files do not exist. We need to make these folders and make them accessible. Open a new terminal and follow the commands below:
- [oracle@localhost ~]# cd /
- [oracle@localhost /]# su root
- password:
- [root@localhost /]# mkdir oradata
- [root@localhost /]# chmod 777 oradata
- [root@localhost /]# cd oradata
- [root@localhost oradata]# mkdir PS91DMO
- [root@localhost oradata]# chmod 777 PS91DMO
- Copy the needed Scripts to a new folder
- Open a new terminal and follow the commands below:
- [oracle@localhost ~]# cd $PS_HOME -Note /apps/psoft/
- [oracle@localhost psoft]# mkdir modifiedscripts
- [oracle@localhost psoft]# cp -r /apps/psoft/scripts/unix/ /apps/psoft/modifiedscripts
- Modify the createdb10.sql script and run it.
- Modify the createdb10.sql script
- Open a new termianl and follow the commands below:
- [oracle@localhost ~]# cd $PS_HOME -Note: /apps/psoft
- [oracle@localhost psoft]# cd modifiedscripts/unix
- [oracle@localhost unix]# gedit createdb10.sql
- At this point a text editor should popup.
- Use the "Replace All" function of the editor to Replace "<SID>" with "PS91DMO"
- Use the "Replace All" function of the editor to Replace "/u01/" with "/"
- Save the File
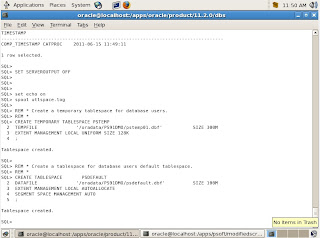
- Run the script modified createdb10.sql script:
- [oracle@localhost ~]# export ORACLE_SID=PS91DMO --sqlplus uses this command as to point to a new database. Sqlplus will not start correctly if this is not set. Another safety tip is to check the user. Do not run sqlplus as the "root" user. This can be set in the PATH
- [oracle@localhost ~]# sqlplus / AS SYSDBA
- SQL> @/apps/psoft/modifiedscripts/createdb10.sql
- Create a spfile and bounce the database:
- From the same terminal that you used from step 6 enter in the following command:
- SQL> create spfile='/apps/oracle/product/11.2.0/dbs/spfilePS91DMO.ora' from pfile='/apps/oracle/product/11.2.0/dbs/initPS91DMO.ora';
- SQL> shutdown immediate -Note: This will shutdown the database service.
- With in the terminal enter the commands below:
- [oracle@localhost dbs]# sqlpus / AS SYSDBA
- SQL> startup
- Modify and run the utlspace.sql script
- Open a new termianl and follow the commands below:
- [oracle@localhost ~]# cd $PS_HOME -Note: /apps/psoft
- [oracle@localhost psoft]# cd modifiedscripts/unix
- [oracle@localhost unix]# gedit utlspace.sql
- Again a text editor should popup and we can use the "Replace All" function to replace the two following fields and then save the file:
- Replace "/u03/" with "/"
- Replace "<SID>" with "PS91DMO"
- It is now time to run the utlspace.sql script -Note: When you run this script it will take a while.
- Open a terminal and follow the steps below:
- [oracle@localhost ~]# export ORACLE_SID=PS91DMO
- [oracle@localhost ~]# sqlplus / AS SYSDBA
- SQL> @/apps/psoft/modifiedscripts/utlspace.sql
- Run the dbowner.sql script
- Open an new terminal and follow the steps below:
- [oracle@localhost ~]# export ORACLE_SID=PS91DMO
- [oracle@localhost ~]# sqlplus / AS SYSDBA
- SQL> @/apps/psoft/modifiedscripts/dbowner.sql
- Modify and run the hcddl.sql script
- Modify the script:
- Open a new terminal and follow the commands below:
- [oracle@localhost ~]: cd $PS_HOME/modifiedscripts/unix
- [oracle@localhost unix]: gedit hcddl.sql
- At this time a text editor should appear and we will again use the "Replace All" for the following fields:
- Replace "/u04/" with "/"
- Replace "<SID>" with "PS91DMO"
- Open an new terminal and follow the steps below:
- [oracle@localhost ~]# export ORACLE_SID=PS91DMO
- [oracle@localhost ~]# sqlplus / AS SYSDBA
- SQL> @/apps/psoft/modifiedscripts/hcddl.sql
- Run the psroles.sql script
- Open an new terminal and follow the steps below:
- [oracle@localhost ~]# export ORACLE_SID=PS91DMO
- [oracle@localhost ~]# sqlplus / AS SYSDBA
- SQL> @/apps/psoft/modifiedscripts/psroles.sql
- Run the psadmin.sql script
- Open an new terminal and follow the steps below:
- [oracle@localhost ~]# export ORACLE_SID=PS91DMO
- [oracle@localhost ~]# sqlplus / AS SYSDBA
- SQL> @/apps/psoft/modifiedscripts/psadmin.sql
- When the script runs enter the following for the user name and password make sure it is all caps!:
- Username: SYSADM
- Password: SYSADM
- Select PSDEFAULT as the file system.
- Run the connect.sql script. "It is easier to keep the defaults".
- Open an new terminal and follow the steps below:
- [oracle@localhost ~]# export ORACLE_SID=PS91DMO
- [oracle@localhost ~]# sqlplus / AS SYSDBA
- SQL> @/apps/psoft/modifiedscripts/connect.sql
- Finally we are on the last step of the Seed Database Install. We need to modify the tnsnames.ora file and then start the listener. After this step we will need to configure the Seed Database with data.
- Edit the tnsnames.ora file.
- Open a new terminal and follow the commands below:
- [oracle@localhost ~]# cd $ORACLE_HOME --Note: ORACLE_HOME=/apps/oracle/product/11.2.0
- [oracle@localhost 11.2.0]# cd network/admin
- [oracle@localhost network]# gedit tnsnames.ora
- At this point a text editor should popup. Edit the tnsnames.ora file with the folowing fields:
- Start the lsnrctl:
- Open a new terminal and follow the commands below:
- [oracle@localhost ~]# lsnrctl start
- DB_NAME=PS91DMO DB_FILES=1021 CONTROL_FILES=/oradata/PS91DMO/ctlfile01.ctl,/oradata/PS91DMO/ctlfile02.ctl OPEN_CURSORS=1000 NLS_LENGTH_SEMANTICS=CHAR


- PS91DMO = (DESCRIPTION = (ADDRESS = (PROTOCOL = TCP) (HOST = localhost) (PORT = 1521)) (CONNECT_DATA = (SERVER = DEDICATED) (SERVICE_NAME = PS91DMO) ) )

